卸载:
安装新版本前,请先查看系统是否已经自带了 MariaDB 或者 MySQL 。如果已经自带了数据库,请先卸载。
具体请参见该篇文章《 CentOS Linux 6 / 7 在线 yum 安装 MySQL 5.6 / 5.7 》的 “ 卸载 ” 部分。
安装:
1、先去官网下载最新版的 MySQL:
https://dev.mysql.com/downloads/mysql/
如下图所示,如果是 CentOS Linux 7 请选择 “ Red Hat Enterprise Linux 7 / Oracle Linux 7 (x86, xx-bit) ” ,如果是 CentOS Linux 6 请选择 “ Red Hat Enterprise Linux 6 / Oracle Linux 6 (x86, xx-bit) ” :
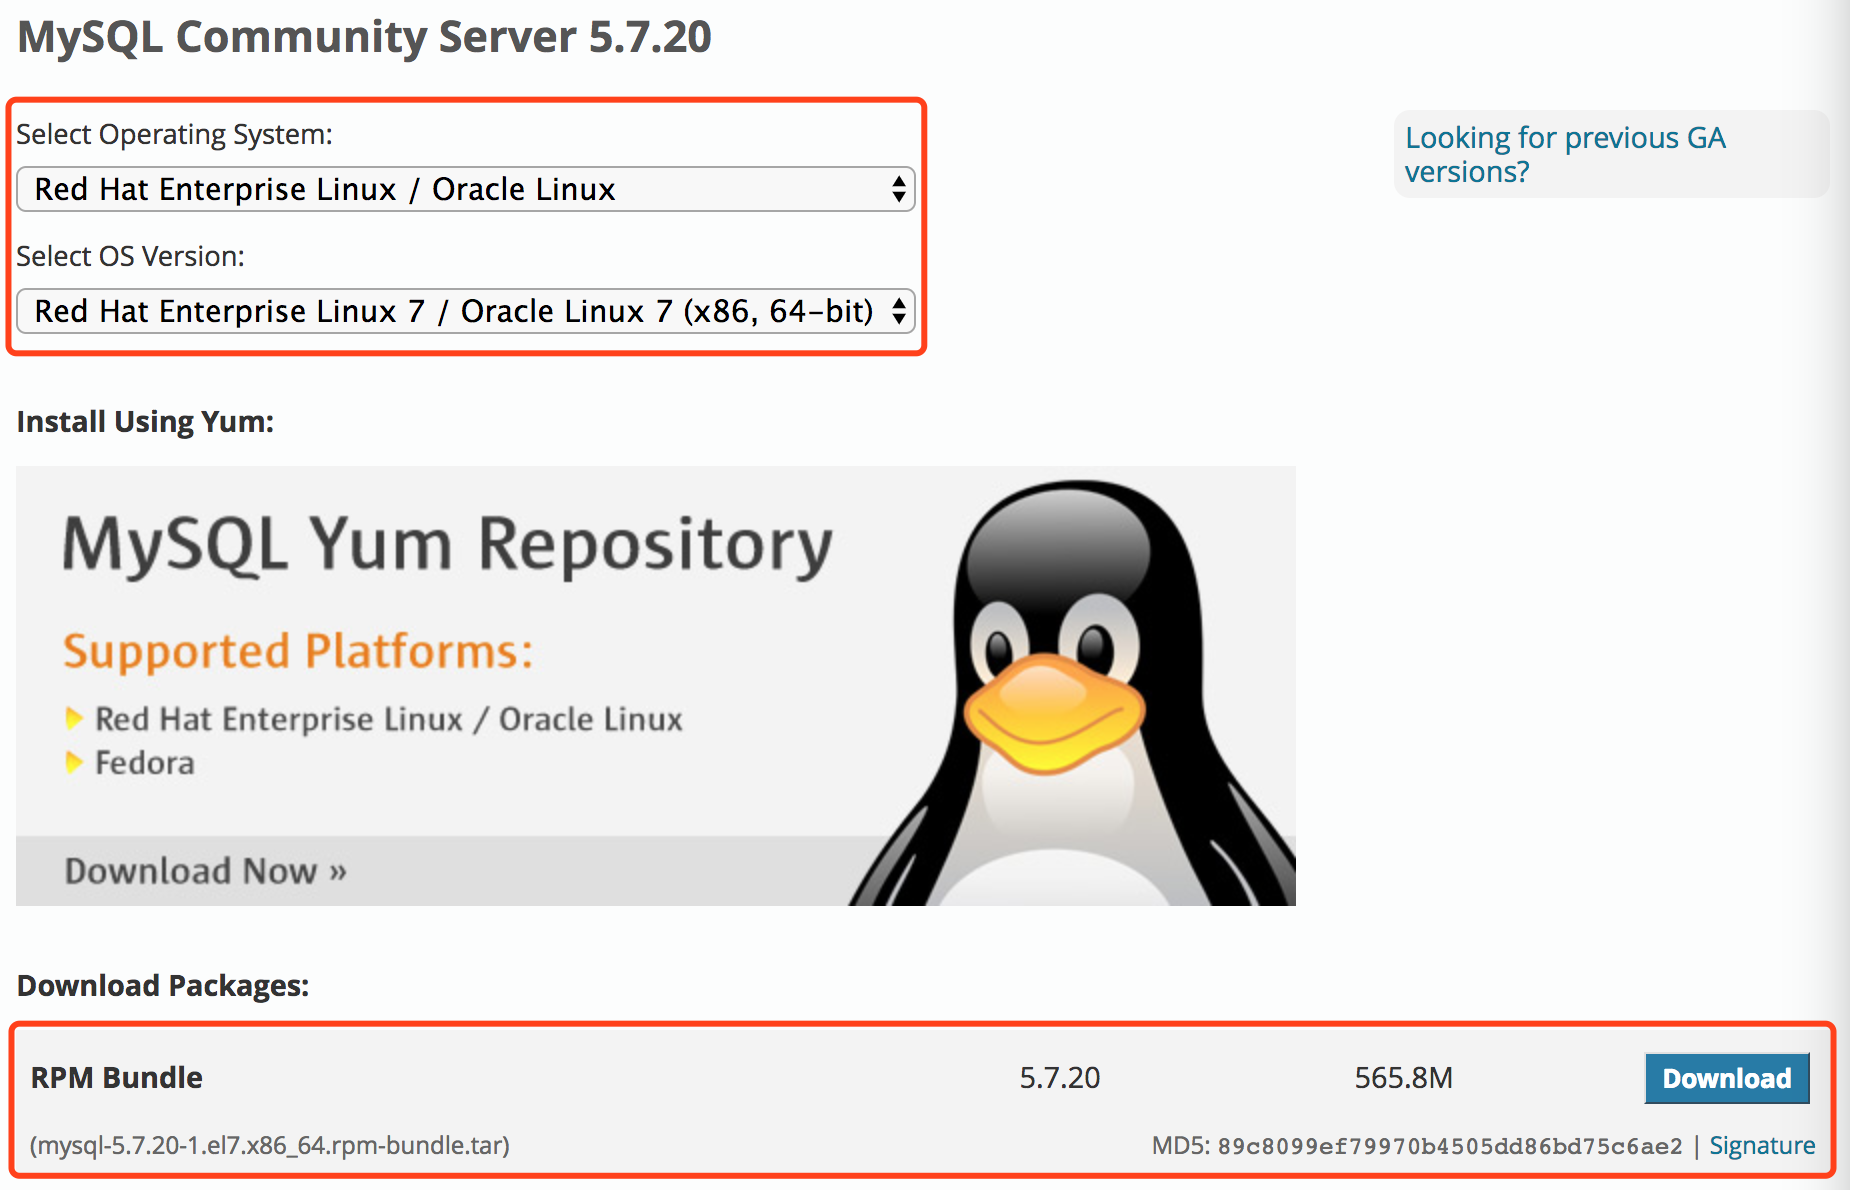
2、下载回本地后,通过 FTP 上传至 CentOS ,Ricky 个人是喜欢上传到 /tmp 目录下。
3、进入 /tmp 目录,运行下面的命令解压:
[root@host ~]# cd /tmp
[root@host tmp]# tar -xvf mysql-5.7.16-1.el7.x86_64.rpm-bundle.tar
[root@host tmp]# ls
mysql-5.7.16-1.el7.x86_64.rpm-bundle.tar                 mysql-community-libs-5.7.16-1.el7.x86_64.rpm
mysql-community-client-5.7.16-1.el7.x86_64.rpm           mysql-community-libs-compat-5.7.16-1.el7.x86_64.rpm
mysql-community-common-5.7.16-1.el7.x86_64.rpm           mysql-community-minimal-debuginfo-5.7.16-1.el7.x86_64.rpm
mysql-community-devel-5.7.16-1.el7.x86_64.rpm            mysql-community-server-5.7.16-1.el7.x86_64.rpm
mysql-community-embedded-5.7.16-1.el7.x86_64.rpm         mysql-community-server-minimal-5.7.16-1.el7.x86_64.rpm
mysql-community-embedded-compat-5.7.16-1.el7.x86_64.rpm  mysql-community-test-5.7.16-1.el7.x86_64.rpm
mysql-community-embedded-devel-5.7.16-1.el7.x86_64.rpm
4、使用 rpm -ivh 命令依次进行安装:
[root@host tmp]# rpm -ivh mysql-community-common-5.7.16-1.el7.x86_64.rpm
[root@host tmp]# rpm -ivh mysql-community-libs-5.7.16-1.el7.x86_64.rpm
[root@host tmp]# rpm -ivh mysql-community-client-5.7.16-1.el7.x86_64.rpm
安装 mysql-community-server-5.7.16-1.el7.x86_64.rpm 前需要安装 libaio-0.3.107-10.el6.x86_64.rpm:
CentOS 6 离线安装:

[root@host tmp]# wget http://mirror.centos.org/centos/6/os/x86_64/Packages/libaio-0.3.107-10.el6.x86_64.rpm
[root@host tmp]# rpm -ivh libaio-0.3.107-10.el6.x86_64.rpm

CentOS 6 / 7 在线安装:

[root@host tmp]# yum -y install libaio
安装 mysql-community-server:
[root@host tmp]# rpm -ivh mysql-community-server-5.7.16-1.el7.x86_64.rpm
5、初始化数据库:
指定 datadir,执行后会生成 ~/.mysql_secret 密码文件:
[root@host tmp]# mysql_install_db --datadir=/var/lib/mysql
初始化,执行后会在 /var/log/mysqld.log 生成随机密码:
[root@host tmp]# mysqld --initialize
随机密码的查看请使用以下命令:
[root@host tmp]# grep 'temporary password' /var/log/mysqld.log
注意,关于 ” 5、初始化数据库 ” 命令更新的说明:
最近在执行第五步时出现了以下问题:

[root@host tmp]# mysql_install_db --datadir=/var/lib/mysql
2018-04-20 15:16:22 [WARNING] mysql_install_db is deprecated. Please consider switching to mysqld --initialize

[root@host tmp]# mysqld --initialize
2018-04-20T07:16:29.343430Z 0 [Warning] TIMESTAMP with implicit DEFAULT value is deprecated. Please use --explicit_defaults_for_timestamp server option (see documentation for more details).
2018-04-20T07:16:29.345164Z 0 [ERROR] --initialize specified but the data directory has files in it. Aborting.
2018-04-20T07:16:29.345192Z 0 [ERROR] Aborting
提示 mysql_install_db is deprecated 和 TIMESTAMP with implicit DEFAULT value is deprecated ,此时执行如下几条命令即可完成第五步的初始化数据库操作:
[root@host tmp]# rm -rf /var/lib/mysql
[root@host tmp]# mysqld --initialize --explicit_defaults_for_timestamp
[root@host tmp]# grep 'temporary password' /var/log/mysqld.log
6、更改 MySQL 数据库目录的所属用户及其所属组,并启动 MySQL 数据库:
[root@host tmp]# chown mysql:mysql /var/lib/mysql -R

[root@host tmp]# systemctl start mysqld    # CentOS 7 下启动 MySQL 服务
[root@host tmp]# systemctl status mysqld    # CentOS 7 下查看 MySQL 服务的状态

[root@host tmp]# service mysqld start    # CentOS 6 下启动 MySQL 服务
[root@host tmp]# service mysqld status    # CentOS 6 下查看 MySQL 服务的状态
7、设置开机自启动:
CentOS 7 下:

[root@host tmp]# systemctl enable mysqld
[root@host tmp]# systemctl daemon-reload

CentOS 6 下:

(1)给 rc.local 文件添加可执行权限:
[root@host tmp]# chmod +x /etc/rc.d/rc.local
[root@host tmp]# chmod +x /etc/rc.local

(2)把 MySQL 的启动命令添加到开机自启动:
[root@host tmp]# echo "service mysqld start" >> /etc/rc.local
至此,安装完成。
默认路径:
具体请参见该篇文章《 CentOS Linux 6 / 7 在线 yum 安装 MySQL 5.6 / 5.7 》的 “ 默认路径 ” 部分。
配置:
具体请参见该篇文章《 CentOS Linux 6 / 7 在线 yum 安装 MySQL 5.6 / 5.7 》的 “ 配置 ” 部分。
发表评论?